
Richard Burr might not have won last year’s Great British Bake Off, but he’s definitely one of the show’s most memorable contestants.
Maybe it’s the pencil behind the ear. Maybe it’s the consistency that saw him scoop the most Star Baker accolades the programme’s ever seen. Or maybe it’s his down-to-earth demeanour, which never saw him flap, fluster or throw a Baked Alaska in the bin.
And while a new crew of bakers craft their showstoppers in this year’s series, 39-year-old Burr has been beavering away releasing his first cookbook.
“I got to spend the whole winter making all of my favourite food,” he tells me in the kitchen of his North London home, which he bought derelict and restored (he runs a building firm with his dad).
The entire book was shot, cover to cover, here (“the crew all but moved in”), and includes lovely images of old tools from Burr’s toolbox, including his beloved grandfather’s saw.
It’s clear family’s really important to him. He lives with his wife Sarah, who joins in when we’re chatting, nips off to M&S insisting she needs to buy us sandwiches and tells me stories about being woken up at 2am for Bake Off taste tests, and drunkenly devouring an entire Beef Wellington when the pair stumbled in after a night out.
And then there are their two daughters, three-year-old Genevieve, and Elizabeth, six, who’s at a summer camp today. Their third child is due in December.
Baking has always filled a delicious hole in Burr’s life.
“Mum baked cakes and kept us alive, but I got a Saturday job in a bakery and scrumped as many doughnuts as I could. That’s where my love of baking really comes from,” he says, as he lays out the ingredients to make the millefeuille recipe from his book, BIY: Bake It Yourself.
“And now I cook with the kids. I’m an early bird, so I’ll often be kicking around with the girls in the morning, and if it’s a choice between cooking in the kitchen or watching Nickelodeon, I’d rather have them in here with me.”
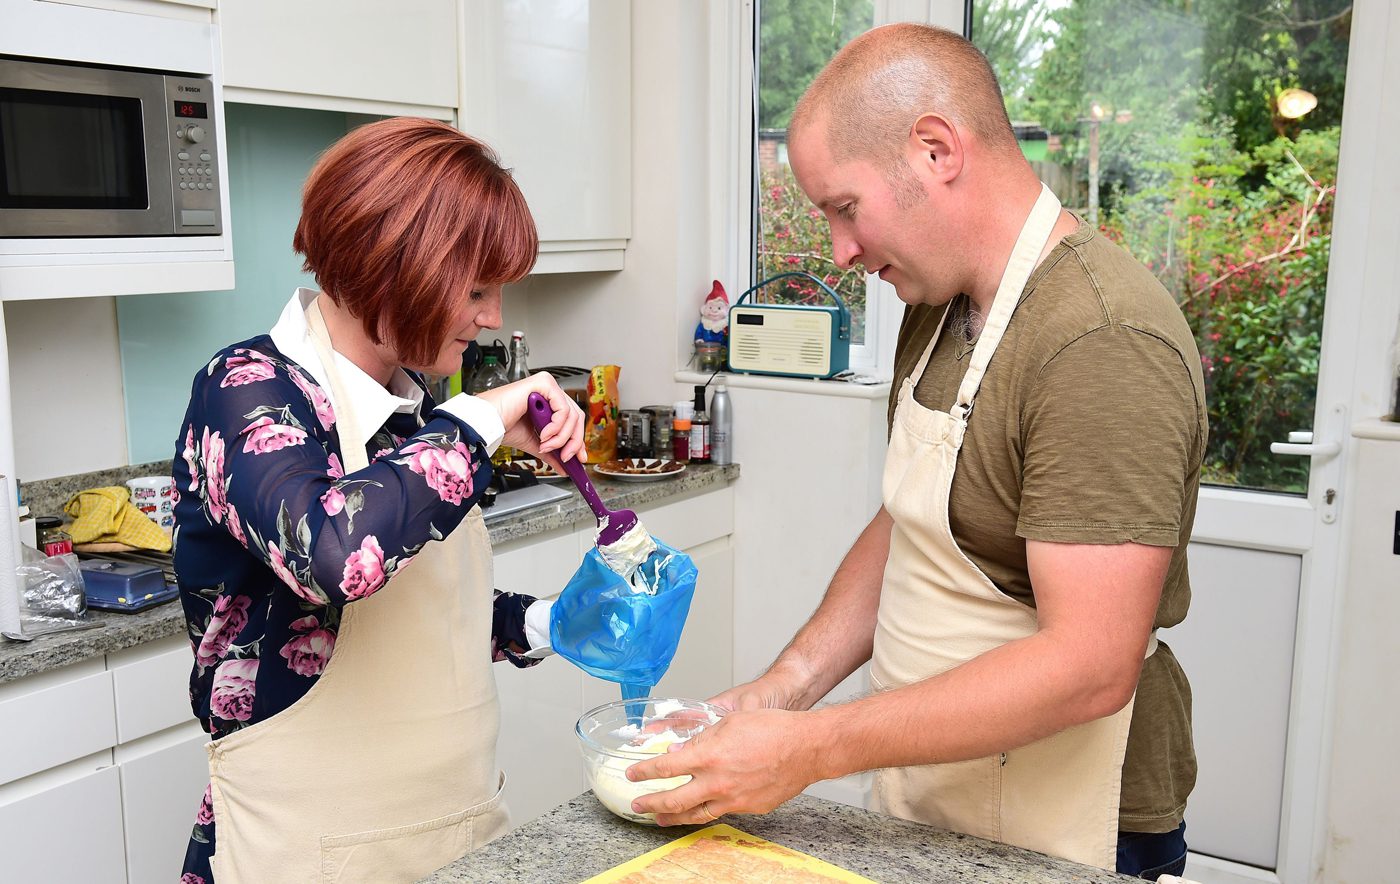
As we get to work on one of Burr’s favourite sweet treats, he’s a pleasure to share a kitchen with, giving me instructions, tips and encouragement as I do my very best not to split the crème pâtissière.
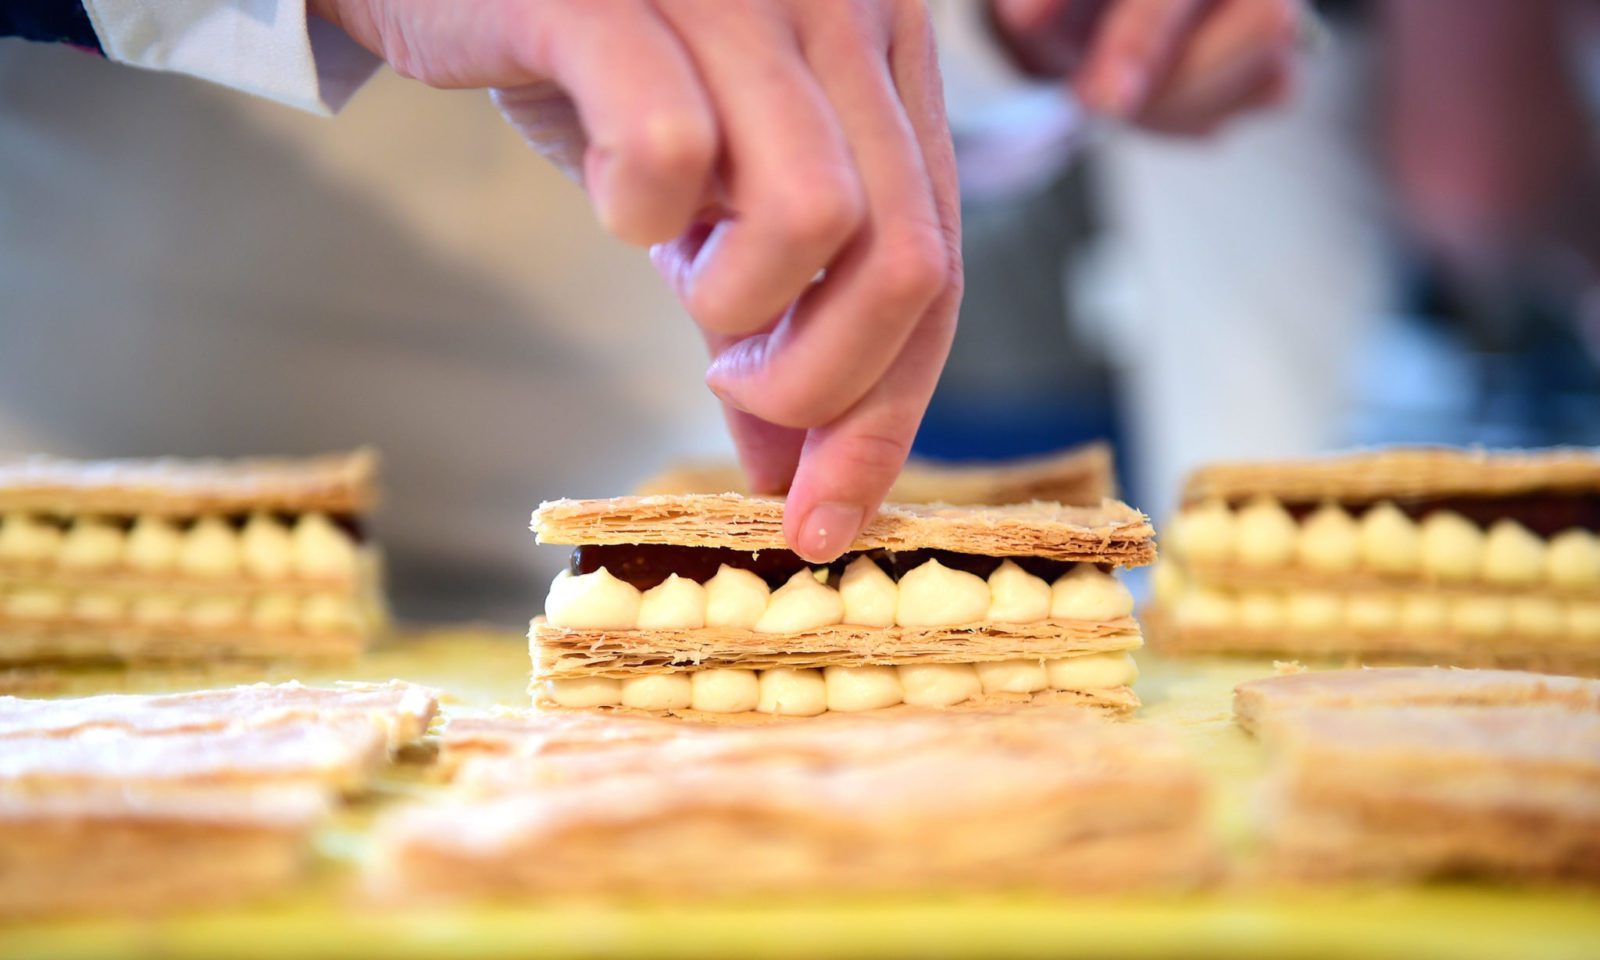
Claire Spreadbury and Richard Burr making millefeuille together in his home. Picture: PA
After the success of Bake Off and landing a book deal, you’d be forgiven for thinking he might decide to knock the hard graft of building on the head. But building is a big part of Burr’s life – evident as he draws out his steel tape measure to size up the slices of cooked puff pastry.
“The business went huge after Bake Off,” he reveals, whipping out some piping bags and wandering about the hub of his home. “I could have just used it to expand, but I wanted to have some fun with food, too. I try not to say ‘no’ to anything.”
Indeed, he has a degree in biodiversity and conservation – which he took on while doing Bake Off and running a building firm, and he somehow managed to get a first.
Burr’s also a keen fisherman. And now, he’s an author, too.
“My favourite recipes from the book include the blackberry and elderflower pavlovas. My wife is actually pathologically addicted to them. The millefeuilles are great, and there’s a brilliant mincemeat muffin in there, that doesn’t look much, but once you have it, you’ll never eat mince pies again.”
Picture: PA
And with that, he shows me how to pipe the custard and stack the millefeuille, we throw a load of icing sugar over the top, skip lunch and go straight to dessert – delicious!
Fancy baking some of Richard Burr’s creations for yourself? Give these tasty treats a whirl...
Fig and anise millefeuille
Makes ten
Ingredients:
• 2/3 quantity puff pastry dough
(shop bought is fine)
• plain flour, to dust
• icing sugar, to dust
For the custard
• 170ml whole milk
• 3 star anise
• 2 egg yolks
• 35g caster sugar
• 1½bsp cornflour
• 100ml double cream
For the figs in syrup
• 4 baby figs
• finely grated zest and juice of
• 1 orange
• 50g light brown muscovado sugar
• 1 cinnamon stick
1 Start with the custard. Pour the milk into a saucepan with the star anise and set over a medium heat. Bring to a simmer, then take off the heat and leave to infuse for 10 minutes.
2 Put the egg yolks in a heatproof bowl and whisk with the caster sugar and cornflour, using a hand or electric whisk.
3 Once the milk has infused, fish out the star anise and pour the milk into the egg mixture, whisking as you do so. Pour back into the saucepan and set over a low heat. Stir constantly, using a silicone spatula, until the custard thickens up, then quickly scrape into a clean bowl. Lay cling film on the surface of the custard (to stop a skin forming) and put in the fridge to cool.
4 While the pastry is chilling in the fridge, you can poach the figs. Cut each fig into sixths, put in a saucepan with the orange zest and juice, sugar and cinnamon stick and set over a low heat.
Once simmering, cook for eight to 10 minutes, occasionally turning the figs. Fish the figs out of the saucepan and lay on a plate. Put in the fridge to cool.
5 Preheat the oven to 220C/Gas Mark 7. Line a baking tray with baking parchment and take the pastry out of the fridge.
Roll it out on a floured surface to a neat rectangle 30cm x 25cm and lay this on the baking tray. Lay another sheet of baking parchment on top of this and weigh it down with another baking tray to stop the pastry from puffing up too far. Bake in the oven for 10 minutes.
6 Take the tray off the top of the pastry and return to the oven for another 10-12 minutes until golden brown and cooked through. Remove from the oven, take the pastry off the tray and off the baking parchment. Set on a wire rack to cool down. Returning to the custard, whip the cream with an electric whisk until it forms soft peaks. Take the now-cooled custard out of the fridge and fold in the whipped cream, a couple of tablespoons at a time. Load into a piping bag and snip the end to make an opening about 5mm in diameter.
7 Once the pastry is completely cooled, put it on a chopping board and carefully cut into three rectangles of 25cm x 10cm. Cut each of these into ten pieces, each 10cm x 2.5cm, to give 30 neat fingers of puff pastry. Some of the outside ones may be a bit ragged, but those are generally the baker’s treats.
8 Assemble each pastry: pipe 14 small blobs (two rows of seven) of custard on to the bottom layer of pastry. Lay the next layer on top and pipe on another 14 blobs of custard.
9 Take the figs out of the fridge and cut each segment in half (giving you 48 segments). Lay segments of fig on top of the custard, all facing in the same direction. You might have a few fig pieces left over, depending on size.
10 Lay a third layer of pastry on top and dust with a little icing sugar.
Repeat to assemble all the pastries.
Green olive and rosemary focaccia
Makes two
Ingredients:
• 500g strong white bread flour, plus more if needed
• 2 tsp table salt
• 1 tbsp ‘quick’ yeast
• 50ml olive oil, plus more to knead, prove and shape
• 350ml water
• 20 pitted green olives, in brine or oil
• a few sprigs of rosemary
• sea salt flakes and freshly-ground coarse black pepper
1 Measure the flour, salt and yeast into a bowl, making sure you add the salt and yeast to opposite sides of the bowl, then mix with a wooden spoon. Add the 50ml of olive oil and all the water, and combine with the spoon until you have a wet dough.
2 Pour about two tablespoons of olive oil on to a work surface and tip out the dough on to it. Knead for at least 10 minutes. The dough will be sloppy and this is going to be a messy business, so don’t worry if you get your hands covered. Use your judgement about whether to add more flour; don’t add too much, as it should remain a wet dough.
3 Oil an ice-cream tub or any large plastic container (more than 2litres capacity) and plop the dough in. Cover with cling film and leave to rise at room temperature for one to one-and-a-half hours, until it has at least doubled in size. It might be worth taking a photo of the dough on your phone so you can compare later to see whether it has risen enough.
4 Pour another couple of teaspoons of oil on to a work surface and gently tip out the risen dough. Take two long knives and oil the blades. Cut the dough into two equal pieces: use one knife to cut them, then slide the other knife alongside the first and use both knives to push the halves apart. (This is the easiest way of prising the dough into two pieces.)
5 Gently pick up each half and place on a baking tray, lined with baking parchment, forming each into a thin lozenge shape.
Cover with a plastic bag and leave to rise for 45 minutes. (The bag shouldn’t touch the loaves but should form a tent around them.)
Preheat the oven to 220C/Gas Mark 7 and uncover the dough.
Cut the olives in half lengthways and press firmly into the dough.
Drizzle with a few more tablespoons of oil and lay cut sprigs of rosemary on top. Season with sea salt flakes and pepper.
6 Bake for 20-25 minutes, then remove and cool on two wire racks.
Drizzle with more olive oil before cutting into strips and eating.
• BIY: Bake It Yourself by Richard Burr is published by Quadrille, priced £20. Available now from all good bookshops and online